Banana Ice Cream – Creamy, Healthy & Made with One Ingredient
Prep Time: 10 minutes | Freeze Time: 2 hours | Total Time: 2 hours 10 minutes | Servings: 4 | Calories: 105 kcal per serving
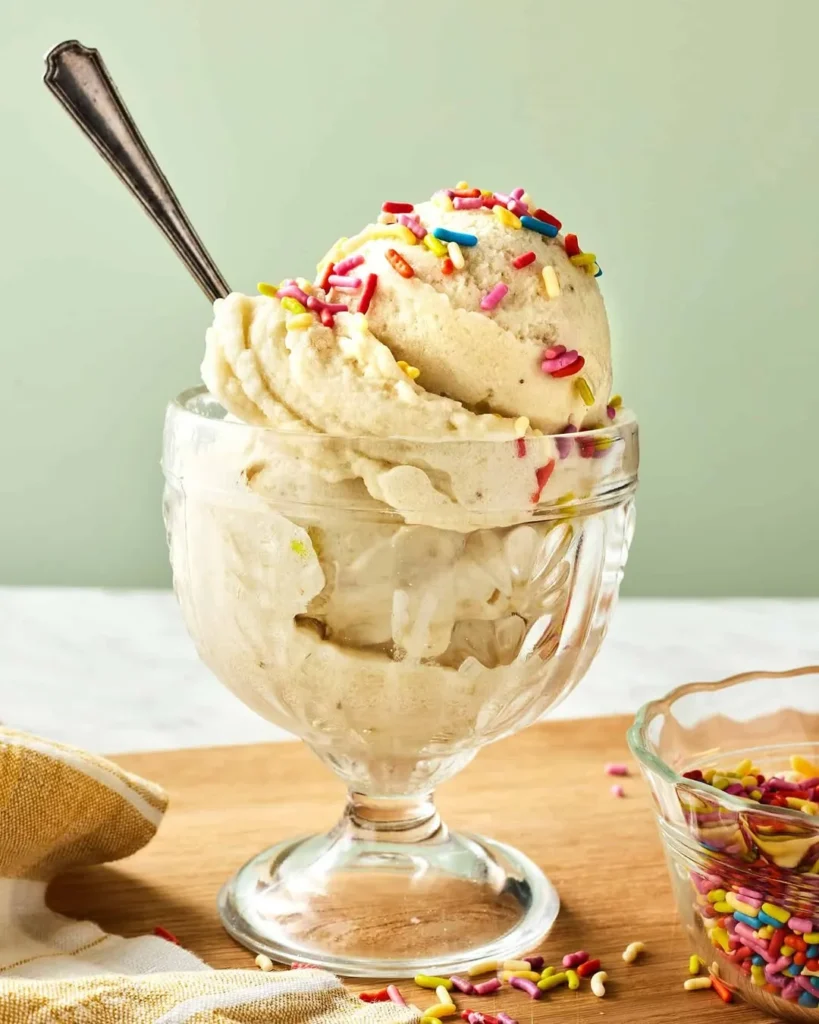
Banana ice cream is frozen ripe bananas blended until completely smooth and creamy into a thick, scoopable frozen dessert that tastes remarkably like soft-serve ice cream with no dairy, no added sugar, no cream, and no churning required. The bananas do everything. The freezer does the rest. The result is genuinely creamy, naturally sweet, and completely satisfying in the way that only a proper frozen dessert can be.
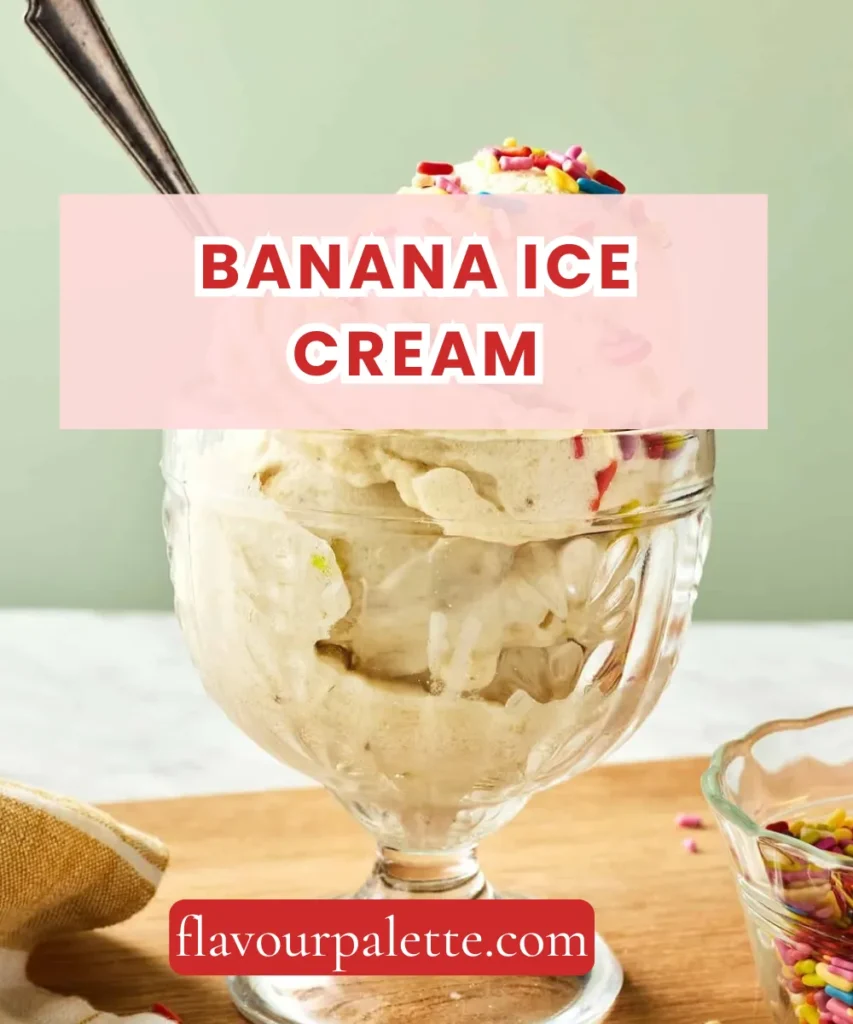
This is the one-ingredient recipe that people refuse to believe until they try it. Sceptics become converts after a single bowl. And once you know the technique, it becomes the base for a dozen different frozen desserts made entirely from fruit.
Ten minutes to prep. Two hours to freeze. Ice cream that requires nothing but bananas and a blender.
Why You Will Love This Recipe
- One ingredient. Just bananas. Nothing else is required. Every addition from this point is optional.
- Naturally sweet and creamy. Frozen ripe bananas blend into a texture that genuinely rivals soft-serve. No additives needed to achieve it.
- No ice cream machine required. A standard blender or food processor handles everything. No specialist equipment.
- Completely dairy-free and vegan. No cream. No milk. No eggs. Suitable for every dietary requirement without compromise.
- Infinitely customisable. Peanut butter, chocolate, mango, strawberry, cinnamon, or coffee. The banana base takes any flavour in any direction.
Ingredients
For the banana ice cream:
- 4 large ripe bananas, peeled, sliced into rounds, and frozen
- Pinch of salt
- ½ teaspoon pure vanilla extract (optional but recommended)
Optional flavour additions:
- 2 tablespoons smooth peanut butter for peanut butter banana ice cream
- 2 tablespoons cocoa powder for chocolate banana ice cream
- ½ cup (75g) frozen strawberries or mango for a fruity twist
- 1 teaspoon instant espresso powder for a coffee banana version
- ½ teaspoon cinnamon and a pinch of nutmeg for a warming spiced version
- 2 tablespoons melted dark chocolate swirled in at the end
For serving:
- Chopped toasted nuts
- Fresh berries
- Honey or maple syrup drizzle
- Crushed graham crackers or granola
- Chocolate chips or dark chocolate shavings
- Flaky sea salt
Equipment Needed
- Blender or food processor
- Knife and cutting board
- Lined baking sheet or freezer-safe tray
- Airtight container for storage
- Ice cream scoop for serving
- Measuring spoons
Instructions
Step 1: Peel the bananas and slice them into rounds approximately 1.5cm thick. Slices blend more easily and evenly than whole frozen bananas. Uniform slices also freeze more consistently.
Step 2: Arrange the banana slices in a single layer on a lined baking sheet. Do not pile them on top of each other. Pieces touching will freeze together into a clump that is difficult to break apart before blending.
Step 3: Freeze the banana slices for a minimum of 2 hours until completely solid. Overnight is better and more convenient. Fully frozen slices are essential. Partially frozen banana blends into a smoothie rather than a creamy ice cream texture.
Step 4: Remove the frozen banana slices from the tray and transfer to a blender or food processor. If they have frozen together slightly, break them apart with your hands before adding them to the machine.
Step 5: Add the pinch of salt and vanilla extract if using. Add any flavour additions now if making a flavoured version.
Step 6: Blend on high. The bananas will go through several stages. First, they will look crumbly and grainy. Then chunky and slightly smooth. Then the mixture will suddenly come together into a thick, creamy, pale yellow cream that looks exactly like soft-serve ice cream. This transformation takes 1 to 3 minutes, depending on the power of the blender.
Step 7: Stop the blender and scrape down the sides with a rubber spatula every 30 to 45 seconds. The mixture is thick, and the blender needs help keeping everything moving. Be patient. The creaminess will happen.
Step 8: If the blender struggles to move the mixture, add one tablespoon of liquid at a time. A splash of milk, plant-based milk, or water loosens the mixture just enough to keep blending without compromising the final texture. Add as little liquid as possible to maintain thickness.
Step 9: Once the mixture is completely smooth and creamy with no lumps remaining, it is ready. At this stage, it has the consistency of soft-serve ice cream and can be eaten immediately, directly from the blender.
Step 10: For a firmer, scoopable texture, transfer the blended banana ice cream to an airtight container. Smooth the surface flat. Press a piece of cling wrap directly onto the surface to prevent ice crystals from forming. Seal the container.
Step 11: Return to the freezer for 1 to 2 hours until firm enough to scoop cleanly. Do not freeze for more than 4 to 5 hours without serving, as it hardens beyond a pleasant scooping consistency.
Step 12: Remove from the freezer and let it sit at room temperature for 3 to 5 minutes before scooping. Serve in bowls or cones with your chosen toppings.
Substitutes & Swaps
Ripe bananas: The riper the better. Bananas with black speckled or fully yellow-brown skins are at peak sweetness and produce the creamiest, most flavourful ice cream. Underripe bananas are starchy, not sweet, and produce a flat, pale result that tastes nothing like ripe banana ice cream.
Vanilla extract: A scraped vanilla bean pod gives a more intense, floral vanilla flavour. Almond extract used at half the quantity gives a completely different but delicious result.
Standard blender: A food processor works equally well and often handles the thick frozen mixture more easily than a standard blender. High-powered blenders, such as a Vitamix, produce the smoothest result of all.
Airtight container: A loaf tin lined with cling wrap and covered tightly with foil works perfectly for freezing and produces a shape that is easy to scoop from.
Variations
Peanut Butter Chocolate Banana Ice Cream: Add 2 tablespoons of smooth peanut butter and 2 tablespoons of cocoa powder to the blender with the frozen banana. Blend until completely smooth. The combination of banana, peanut butter, and chocolate is one of the great frozen dessert flavour combinations.
Mango Banana Ice Cream: Replace one banana with ½ cup of frozen mango chunks. The mango adds a tropical sweetness and a vivid golden colour. Finish with a squeeze of fresh lime juice blended in at the end.
Strawberry Banana Ice Cream: Add ½ cup of frozen strawberries to the blender with the banana. The strawberry turns the ice cream a natural pink and gives a bright, fruity flavour that is outstanding on a hot day.
Mint Chocolate Chip Banana Ice Cream: Add ¼ teaspoon of peppermint extract and a handful of dark chocolate chips stirred in after blending. The mint and chocolate against the creamy banana is surprisingly good and very refreshing.
Cookie Dough Banana Ice Cream: Stir small balls of edible egg-free cookie dough through the blended banana ice cream before the second freeze. Press the dough pieces in evenly and freeze until scoopable.
Banana Foster Ice Cream: Add ½ teaspoon of cinnamon, a pinch of nutmeg, and 1 tablespoon of brown sugar to the blender. Serve with a drizzle of warm caramel sauce over the top. A frozen homage to the classic New Orleans dessert.
Tips & Tricks
Use the ripest bananas possible. Ripe bananas with brown speckled or yellow-brown skins contain significantly more sugar and less starch than yellow bananas. That sugar is what produces the natural sweetness and creamy texture of the finished ice cream. A green or pale yellow banana will produce a starchy, bland result with almost no sweetness.
Freeze in a single layer. Banana slices piled on top of each other freeze into a solid block that is difficult to separate before blending. A single layer on a tray produces individual frozen pieces that pour freely into the blender.
Be patient during blending. The crumbly, grainy first stage of blending looks wrong and feels discouraging. Do not stop. Keep scraping down the sides and keep blending. The transformation from grainy crumble to smooth, creamy soft-serve happens quickly once it starts, and the result is dramatic.
Add as little liquid as possible. A splash of liquid can help a struggling blender, but too much liquid produces a runny mixture that freezes hard and icy rather than creamy. Add one tablespoon at a time and stop the moment the blades are moving freely.
Press cling wrap onto the surface before the second freeze. Direct contact between cling wrap and the ice cream surface prevents ice crystals from forming on the top layer during the second freeze. Ice crystals make the surface grainy and unpleasant. This single step keeps the texture smooth and creamy all the way to the last scoop.
Eat soft-serve straight from the blender. The texture immediately after blending is the closest to real soft-serve that banana ice cream achieves. If the soft-serve texture is the goal, serve it immediately. The second freeze firms it up significantly and changes the eating experience.
Do not freeze for too long after the second freeze. Banana ice cream is at its best between 1 and 4 hours after the second freeze. Beyond 4 to 5 hours, it hardens considerably and requires significant thawing time before scooping. Plan the second freeze time so it is ready when needed.
Let it sit before scooping. Three to five minutes at room temperature after removing from the freezer makes a significant difference to scoopability. A scoop dragged through ice cream that is too hard tears rather than scoops cleanly. A brief rest produces perfect, round scoops every time.
Nutrition Information (Per Serving)
| Nutrient | Amount |
|---|---|
| Calories | 105 kcal |
| Total Fat | 0.5g |
| Saturated Fat | 0g |
| Carbohydrates | 27g |
| Fibre | 3g |
| Sugars | 14g |
| Protein | 1g |
| Sodium | 40mg |
Nutrition is based on one serving of plain banana ice cream made with four bananas, vanilla extract, and salt. Optional additions and toppings not included.
Frequently Asked Questions (FAQs)
Why does my banana ice cream taste starchy and not sweet?
The bananas were not ripe enough before freezing. An underripe banana is mostly starch. A ripe banana with brown speckled skin has converted much of that starch into sugar. The sweetness and creaminess of banana ice cream are entirely dependent on ripeness. Freeze only bananas that are at or past peak ripeness.
Can I make this without a blender?
A food processor is the best alternative and handles the thick frozen mixture very well. A high-powered immersion blender in a tall container can work with patience and frequent scraping. A standard hand mixer will not produce a smooth result. A blender or food processor is the correct tool for this recipe.
How do I stop it from freezing rock hard after the second freeze?
Do not freeze beyond 4 to 5 hours. The absence of fat and sugar that normally keeps dairy ice cream scoopable means banana ice cream hardens faster in the freezer. Always let it sit at room temperature for 3 to 5 minutes before scooping. Adding a tablespoon of coconut oil or peanut butter to the blended mixture also helps maintain a softer texture after freezing.
Can I freeze the bananas in their skins?
It is not recommended. Frozen banana skin is very difficult to remove, and the effort required to peel a frozen banana is disproportionate to the ease of peeling before freezing. Always peel and slice before freezing.
How long can I store banana ice cream in the freezer?
Up to 2 weeks in a sealed airtight container. Beyond 2 weeks, the flavour dulls, and ice crystals develop that affect the texture noticeably. For the best flavour and texture, consume within the first week.
Can I make a large batch?
Yes. Double or triple the recipe using the same technique. Work in batches if the blender cannot handle a large quantity at once. Store in individual serving-sized containers so only the portion needed is thawed each time rather than the entire batch.
My blender is struggling with the frozen banana. What should I do?
Stop the blender completely. Scrape down the sides with a rubber spatula and break up any large frozen clumps. Add one tablespoon of liquid and blend again. Repeat until the mixture is moving freely. A food processor handles very thick frozen mixtures more effectively than most standard blenders if struggling is a recurring problem.
The Dessert That Surprises Everyone
There is a moment when banana ice cream moves from crumbly frozen pieces to smooth, creamy soft-serve inside the blender that feels genuinely remarkable the first time it happens. Nothing else was added. No cream. No sugar. No magic ingredient. Just frozen ripe bananas doing something unexpected.
Slice and freeze the bananas the night before. Blend when the craving arrives. Eat it immediately from the blender for soft-serve or freeze it for another hour for something scoopable.
Serve it to someone who has never tried it without telling them what it is.
Watch their face when they find out.
Made banana ice cream? Leave a comment below and tell me which flavour variation you tried, what toppings you added, and whether anyone guessed the secret ingredient before you told them. I would love to hear every detail.
Banana Ice Cream
Ingredients
- Banana Ice Cream:
- 4 large ripe bananas peeled and sliced into rounds
- Pinch of salt
- ½ teaspoon pure vanilla extract optional
- Optional Flavour Additions:
- 2 tablespoons smooth peanut butter
- 2 tablespoons cocoa powder
- ½ cup frozen strawberries or mango
- 1 teaspoon instant espresso powder
- ½ teaspoon cinnamon and pinch of nutmeg
- For Serving:
- Chopped toasted nuts
- Fresh berries
- Honey or maple syrup drizzle
- Granola or crushed graham crackers
- Chocolate chips or dark chocolate shavings
- Flaky sea salt
Instructions
- Peel and slice bananas into 1.5cm rounds.
- Arrange in a single layer on a lined baking sheet. Freeze minimum 2 hours or overnight until completely solid.
- Transfer frozen slices to blender or food processor. Add salt, vanilla, and any flavour additions.
- Blend on high, scraping down sides every 30 to 45 seconds. Blend through the crumbly stage until completely smooth and creamy. This takes 1 to 3 minutes.
- Add one tablespoon of liquid at a time only if blender struggles to move.
- For soft-serve texture, serve immediately directly from the blender.
- For scoopable texture, transfer to an airtight container. Press cling wrap directly onto the surface. Freeze 1 to 2 hours.
- Remove from freezer. Rest 3 to 5 minutes before scooping.
- Serve with chosen toppings.
Notes
- Use the ripest bananas available — brown speckled skin produces the sweetest, creamiest result
- Freeze in a single layer, so slices remain individual and pour freely into the blender
- Be patient during blending — the crumbly stage always precedes the creamy stage
- Add liquid one tablespoon at a time only if the blender is struggling
- Press cling wrap directly onto the surface before the second freeze to prevent ice crystals
- Eat soft-serve immediately from the blender for the best soft-serve texture
- Do not freeze beyond 4 to 5 hours after the second freeze, or it hardens significantly
- Rest 3 to 5 minutes at room temperature before scooping after the second freeze
- Store in the freezer for up to 2 weeks — best within the first week
- Adding a tablespoon of coconut oil or peanut butter helps maintain a softer texture after freezing